
Dragoturkeys
Mounts
Mounts on Astrub Legacy are simpler and more rewarding than in the original game: every Dragoturkey is tame and rideable, there are no gauges to babysit, and breeding is one clear roll in a dedicated window. Breed your way up ten tiers, and trade the mounts you no longer need to Smakko for tokens.
- Ride from level 1Every mount can be ridden, captured or bred, young or old.
- No gaugesNo energy, tiredness, love, stamina, maturity or serenity to manage.
- 10 tiersTwo mounts of one tier breed a foal of the next tier.
- 50–100% oddsHigher mount levels mean better odds. A failure still gives a foal.
- Breeds onceEach mount can be bred a single time, then it is sterile.
- TokensSmakko buys any mount for Mount Tokens: tier × tier.
Your first mount
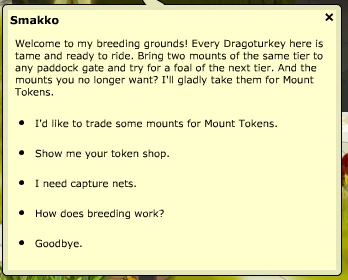
Everything starts with Smakko, the Dragoturkey breeder, at [-17,0] in Amakna. Talk to him to trade mounts, open his token shop or buy capture nets.
- Buy a capture net
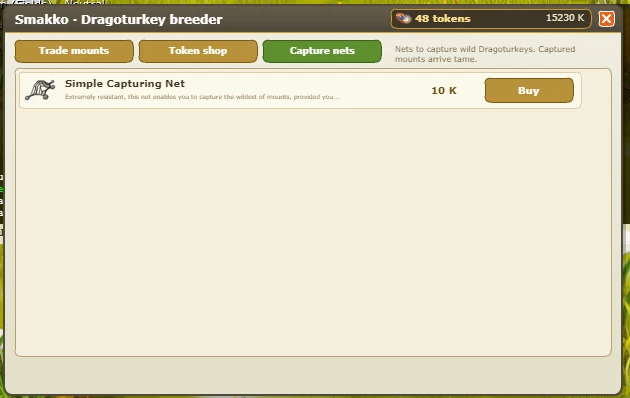
Smakko sells the Simple Capturing Net for 10 kamas, or 5 nets for 1 Mount Token.
- Equip it and fight wild Dragoturkeys
Put the net in your weapon slot, learn the Mount Taming spell and cast it during a fight against Wild Almond, Wild Ginger or Wild Golden Dragoturkeys.
- Win the fight with no mount equipped
At the end of a won fight, one tamer with a net may capture a Dragoturkey. The net is used up when the capture works, and the mount only joins you if you have no mount equipped, so put yours in a stable first.
- Ride it straight away
Captured mounts arrive domestic: a Wild Almond becomes an Almond Dragoturkey, a Wild Ginger a Ginger one and a Wild Golden a Golden one. All three are Tier 1 and can be ridden immediately.
Capture chance: the Mount Taming rank gives 15, 20, 25, 30, 35 or 45%, plus 15% against Wild Almond or Wild Ginger groups (5% when a Wild Golden is in the group).
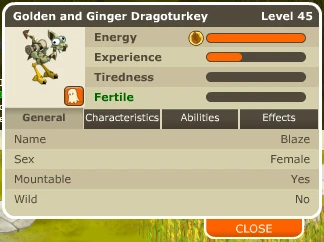
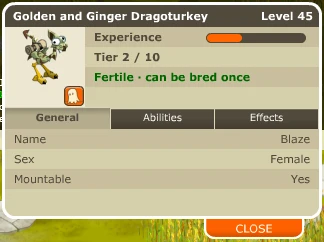
No more gauges
The mount sheet now shows what matters: the mount's tier, its experience and whether it is still fertile. Energy, tiredness, love, stamina, maturity and serenity are gone, so there is nothing to feed, rest or train in paddock objects. Older mounts were converted automatically.
The ten tiers
Every Dragoturkey colour belongs to one of ten tiers, following the original breeding generations. Each tier's colours, what Smakko pays for one, and the native crossbreed recipes that decide a foal's colour are listed below.
Loading the tiers…
Breeding
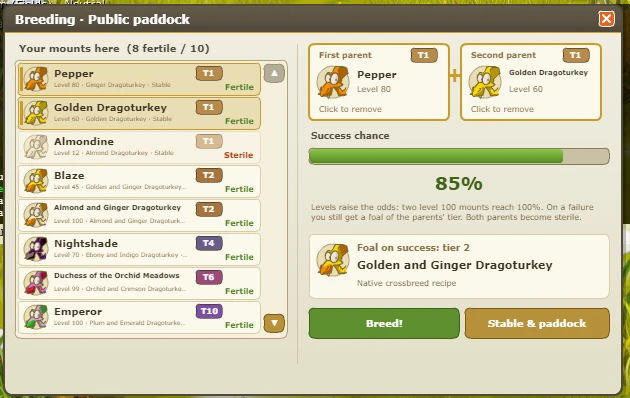
Click any paddock gate, public or guild, to open the Breeding window. It lists your mounts in that paddock's stable and paddock, plus the certificates in your inventory.
- Pick two fertile mounts of the same tier
Click them in the list. Mounts marked Sterile have already been bred.
- Check the chance and the foal
The window shows your exact success chance and the foal you get on a success, including the native recipe colour when your pair has one.
- Press Breed!
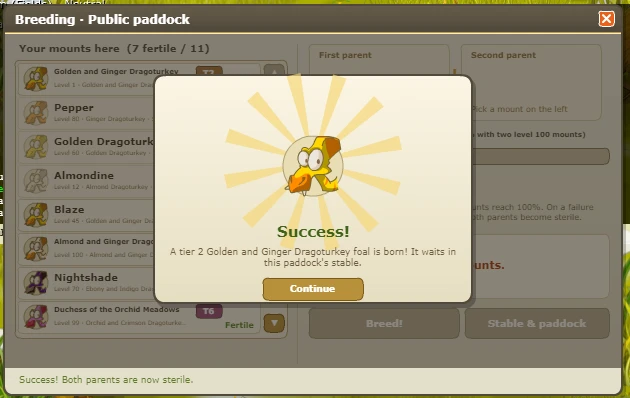
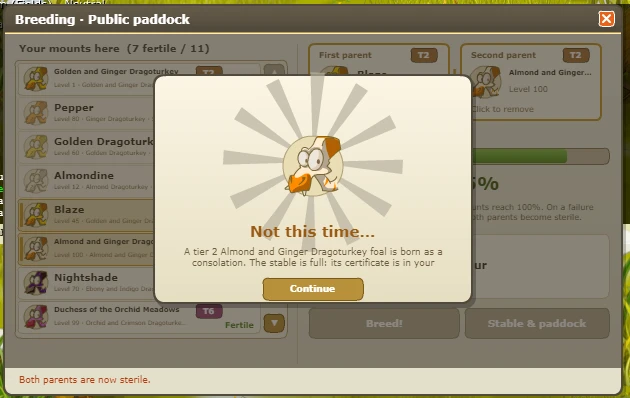
One roll decides it. The foal waits in this paddock's stable, or arrives as a certificate in your inventory if the stable is full.
The rules
- Same tierBoth parents must be of the same tier. A Tier 10 mount is the top and cannot be bred further.
- Breeds onceAfter a breeding, success or failure, both parents become sterile. The foal is fertile.
- SuccessA foal of the next tier. Its colour is the native recipe of the two parent colours when there is one, otherwise a random colour of the next tier.
- FailureA consolation foal of the parents' tier, coloured like one of the two parents.
- Not your ridden mountThe mount you have equipped can never be bred. Put it in a stable first (the Stable & paddock button opens the usual storage).
- Sex does not matterAny two fertile mounts of the same tier can be paired.
Odds calculator
The chance grows with the levels of both parents, from 50% up to 100% for two level 100 mounts. Try your pair:
Paddock experience
Higher levels mean better odds, and there are three ways to level a mount.
- Rest in a paddockMounts left in the paddock (not in the stable) gain 100 experience every minute, 6,000 per hour, until they reach the maximum level. You don't need to stay nearby.
- Fight while ridingThe mount you ride earns experience from your fights, as in the original game.
- Dragoturkey Growth PotionSold by Smakko. It gives your equipped mount 50,000 experience, the same as about 8 hours 20 minutes in a paddock.
Mount Tokens
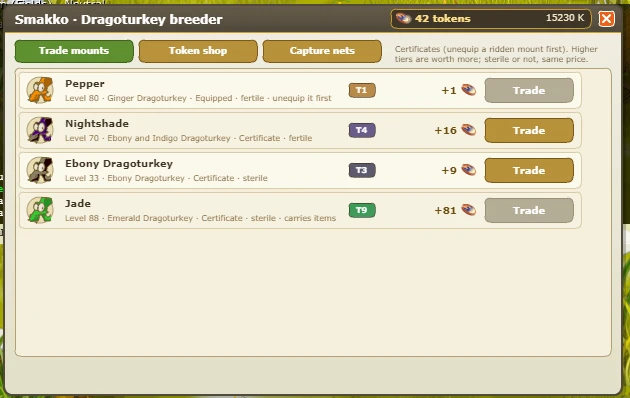
Every mount you don't need is worth something. Smakko buys any Dragoturkey for Mount Tokens, and the value is tier × tier. Fertile or sterile, the price is the same.
| Tier | Tokens |
|---|
- Bring the mount as a certificate in your inventory. Your equipped mount cannot be traded: put it in a stable first to get its certificate.
- Empty the mount's own inventory before trading it.
- Smakko asks you to confirm every trade.
Smakko's token shop
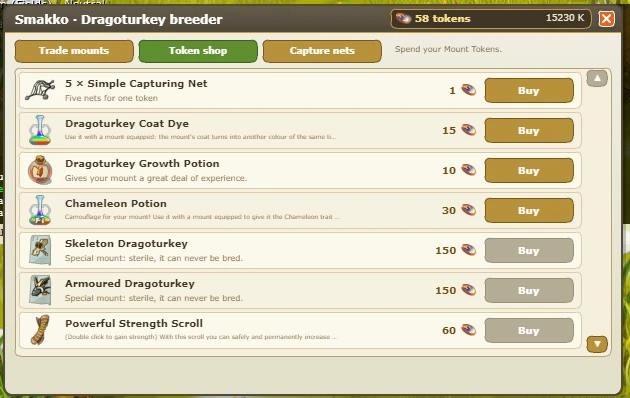
Spend your tokens on nets, mount consumables, characteristic scrolls, spell scrolls and the special Skeleton and Armoured Dragoturkeys.
Coat Dye
Don't like your mount's coat? Use Dragoturkey Coat Dye with the mount equipped: it turns into another colour of the same tier, picked at random. The tier never changes, and the mount's characteristics follow its new colour.
Chameleon Potion
Camouflage for your mount: a Chameleon Potion gives the equipped mount the Chameleon trait for good. Whenever you ride it, it takes on your character's colours. Its tier, colour and characteristics stay the same.
Special mounts
The Skeleton and Armoured Dragoturkeys come as certificates. They can be ridden and traded like any mount, but they are sterile: they can never be bred.
Growth Potion
Gives the equipped mount a large amount of experience in one go, ideal before an important breeding.
| Item | Price |
|---|
Road to Tier 10
A Tier 10 mount is a long project. Since each mount breeds only once, every tier doubles the number of mounts you need, so plan your paddock time and your tokens.
- Capture a herd of Tier 1 mounts
Buy nets in bulk from Smakko (5 per token) and capture Almond, Ginger and Golden Dragoturkeys.
- Level them in a paddock
Leave them in a paddock to gain experience while you play. Two level 100 parents never fail; lower levels risk a consolation foal of the same tier.
- Breed pairs of the same tier
Pair Tier 1 with Tier 1 for Tier 2 foals, then Tier 2 with Tier 2, and so on. Use the calculator to decide when a pair is ready.
- Trade the sterile parents
Every bred parent is sterile but still worth tier × tier tokens. Turn them into nets, Growth Potions and scrolls.
- Repeat up to Tier 10
Tier 9 Emerald and Plum Dragoturkeys breed the Tier 10 colours. Touch up the coat with a Coat Dye if you like.
| Target | Tier 1 mounts | Breedings | Tokens from the sterile parents |
|---|
A failed breeding costs you one mount of that tier (two parents become one consolation foal), so high levels save a lot of captures.
Questions
Where do I breed?
At any paddock gate. Public paddocks work, and so do guild paddocks your guild rights allow you to use. The window only lists the mounts in that paddock plus the certificates you carry.
Why can't I select my mount?
Either it is sterile (already bred once), it is the mount you have equipped, or it is not the same tier as the first parent. Skeleton and Armoured Dragoturkeys can be ridden and traded but never bred.
Does a failed breeding waste my mounts?
Both parents become sterile, but you get a consolation foal of the same tier, and the parents are still worth tokens at Smakko's.
Where is my foal?
In the stable of the paddock where you bred. If that stable is full, the foal arrives as a certificate in your inventory.
Is breeding random?
One roll against the chance shown in the window, done by the server. What you see is exactly what you get.